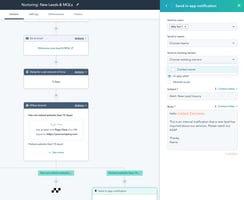
You did it! You made the leap to Hubspot and are flailing around trying to figure out what to do...
Getting Hubspot Operational: Account Set Up
Embarking on your HubSpot journey is a significant milestone for your small business. Setting up your account correctly from the outset ensures you harness the platform's full potential, streamlining your operations and enhancing customer engagement. Let's walk through the essential steps to get your HubSpot account up and running smoothly.
1. Personalize Your Account Settings
Begin by tailoring your account to reflect your business identity and preferences:
-
Account Information: Navigate to your account settings to input essential details such as your company name, address, and industry.
-
Brand Kit: Establish a cohesive brand presence by setting up your brand kit. This includes uploading your company logo, selecting brand colors, and choosing default fonts to ensure consistency across all marketing materials.
-
Time Zone and Language: Adjust your time zone and language preferences to align with your operational region, ensuring accurate scheduling and communication.
2. Connect Your Digital Assets
Integrating your existing digital platforms with HubSpot centralizes your data and streamlines workflows:
-
Domain Connection: Link your website domains to HubSpot by following the domain connection guide. This integration enables advanced tracking and seamless content management.
-
Email and Calendar Integration: Sync your email accounts and calendars to manage communications and appointments directly within HubSpot. Detailed instructions are available for email and calendar integrations.
3. Manage User Access and Permissions
As your team grows, it's vital to control who has access to various parts of your HubSpot account:
-
Adding Users: Invite team members by navigating to 'Users & Teams' in your settings. Click 'Create user' and enter their details.
-
Setting Permissions: Assign roles and permissions to each user, ensuring they have appropriate access levels. This practice maintains data security and operational efficiency.
4. Implement Tracking and Analytics
Understanding user behavior on your website is crucial for informed decision-making:
-
Install Tracking Code: Add the HubSpot tracking code to your website to monitor visitor interactions. This step is essential for gathering analytics and optimizing user experience.
-
Configure Privacy Settings: Ensure your tracking practices comply with privacy regulations by reviewing HubSpot's privacy and consent settings.
5. Import Existing Data
Bringing your current contacts and leads into HubSpot consolidates your information for better management:
-
Prepare Your Data: Organize your existing contacts into a CSV file, ensuring all information is accurate and formatted correctly.
-
Import Contacts: Use HubSpot's import feature to upload your contacts. Follow the contact import guide for a step-by-step walkthrough.
6. Customize Notification Preferences
Stay informed without being overwhelmed by configuring your notification settings:
-
Set Up Notifications: Determine which activities warrant alerts and choose your preferred notification channels.
-
Manage Frequency: Adjust the frequency of notifications to balance awareness with productivity.
7. Explore HubSpot's Resources
Leverage the wealth of knowledge HubSpot offers to maximize your platform utilization:
-
HubSpot Academy: Access free courses and certifications to deepen your understanding of HubSpot's tools and strategies.
-
Knowledge Base: Consult the HubSpot Knowledge Base for detailed articles and guides on various features and functionalities.
8. Set Up Sales Hub
Optimizing your sales processes is crucial for business growth. HubSpot's Sales Hub offers tools to manage your pipeline effectively:
-
Deal Pipelines: Customize your deal stages to reflect your sales process. This setup allows for accurate tracking and forecasting.
-
Email Sequences: Automate follow-up emails to nurture leads efficiently.
-
Automation Workflows: Implement workflows to automate repetitive tasks, freeing up time for your sales team to focus on closing deals.
For a comprehensive guide on setting up and optimizing the Sales Hub, refer to our detailed article: HubSpot Sales Hub: A High-level Guide to Set Up and Optimization.
9. Set Up Marketing Hub
Enhancing your marketing efforts is essential for attracting and retaining customers. HubSpot's Marketing Hub provides a suite of tools to streamline your campaigns:
-
Contact Segmentation: Organize your contacts into targeted lists for personalized marketing.
-
Social Media Integration: Connect your social media accounts to manage and monitor your presence from HubSpot.
-
Email Marketing: Design and send marketing emails using HubSpot's drag-and-drop editor, ensuring consistent branding.
-
Landing Pages and Forms: Create landing pages and forms to capture leads and drive conversions.
-
Workflows: Automate marketing processes to enhance efficiency and effectiveness.
For a step-by-step onboarding checklist, visit our blog post: HubSpot Marketing Hub: Onboarding Checklist.
Final Thoughts
Setting up your HubSpot account is a foundational step toward optimizing your business processes and enhancing customer relationships. By following these steps and utilizing the linked resources, you'll establish a robust platform tailored to your small business needs. Remember, the HubSpot community and support are always available to assist you on this journey.


